Handmade Christmas cards with Stampin’ Up!’s Painted Christmas Suite

Handmade Christmas cards with Stampin’ Up!’s Painted Christmas Suite

Handmade Christmas cards with Stampin’ Up!’s Painted Christmas Suite

I have been keeping busy trying to make all the things that I want to make using Stampin’ Up!’s Painted Christmas Suite from the Mini Catalogue. I’m about halfway there, says my Pinterest board! Traditionally the June to December Mini Catalogue is called the Holiday Catalogue because it features products for the seasons and celebrations that are part of the last half of the year. I couldn’t buy all the things from the catalogue so I focused on two suites that will fulfill my handmade Christmas cards, tags and treat box quota for the holidays. One is the Painted Christmas Suite that I feature in this blog post and the other is the Peaceful Place Suite which I’ll share ideas for soon.

So many ideas!

This suite of products is huge. As soon as you start making one thing, a ton of ideas start flowing through your head and then I start to think that I would need a month off work to get them all made. When using a suite of products, everything coordinates so one idea leads to another very easily.

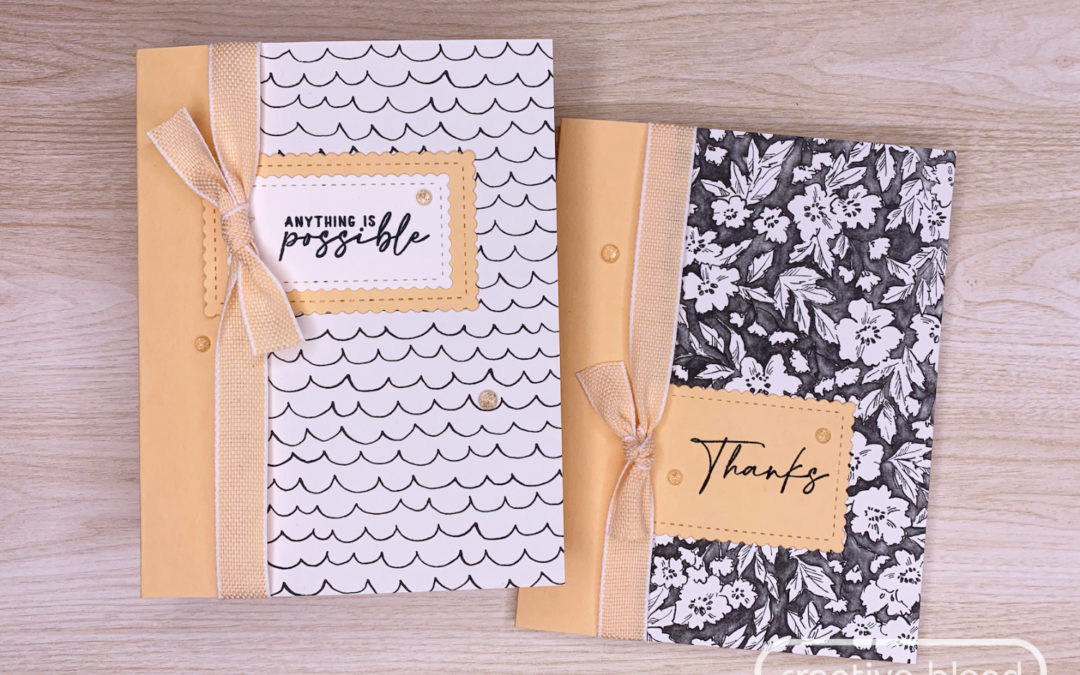
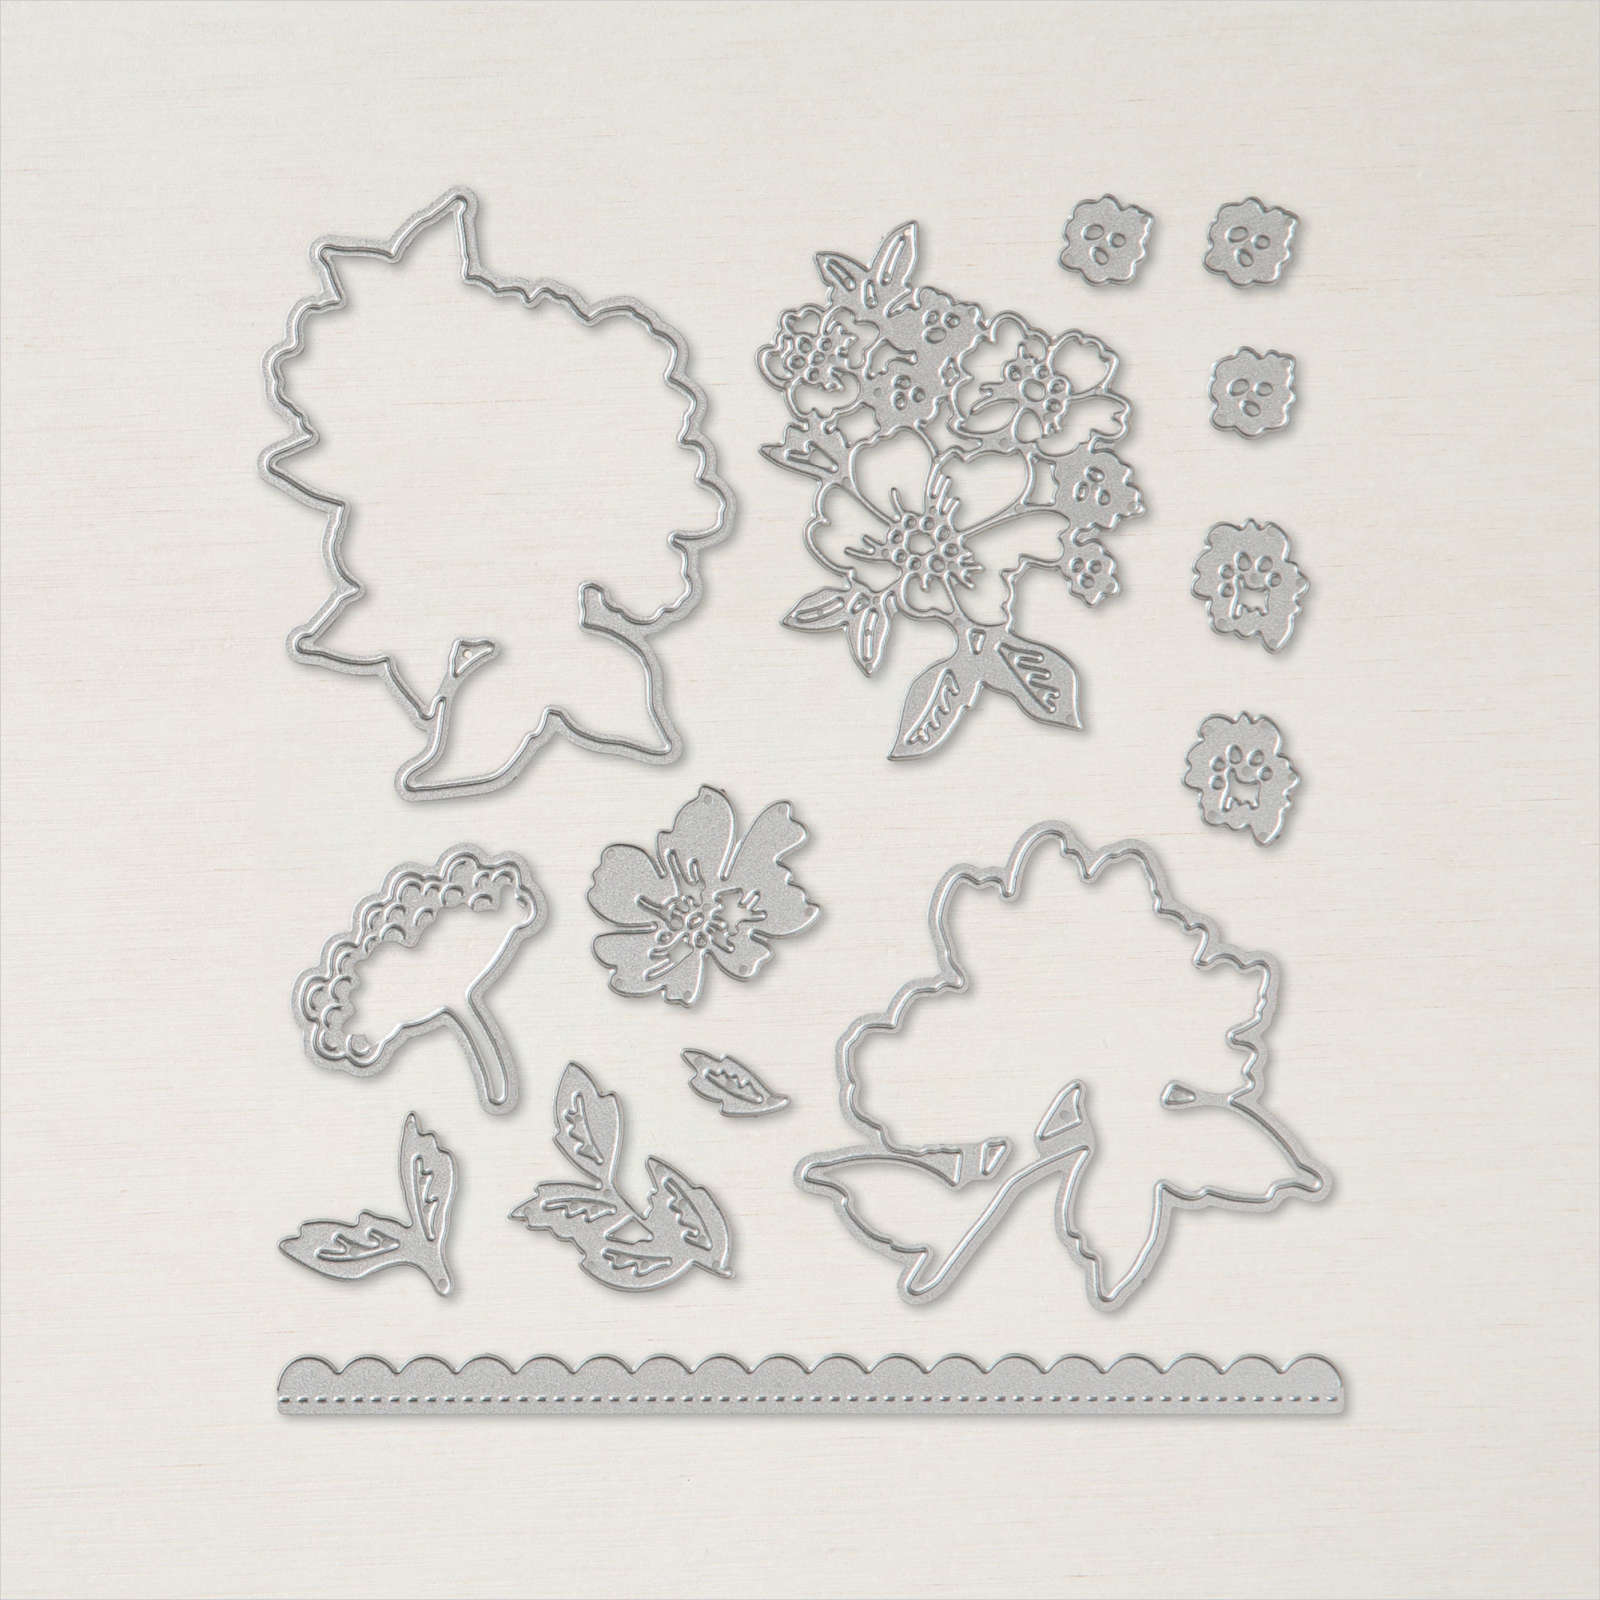
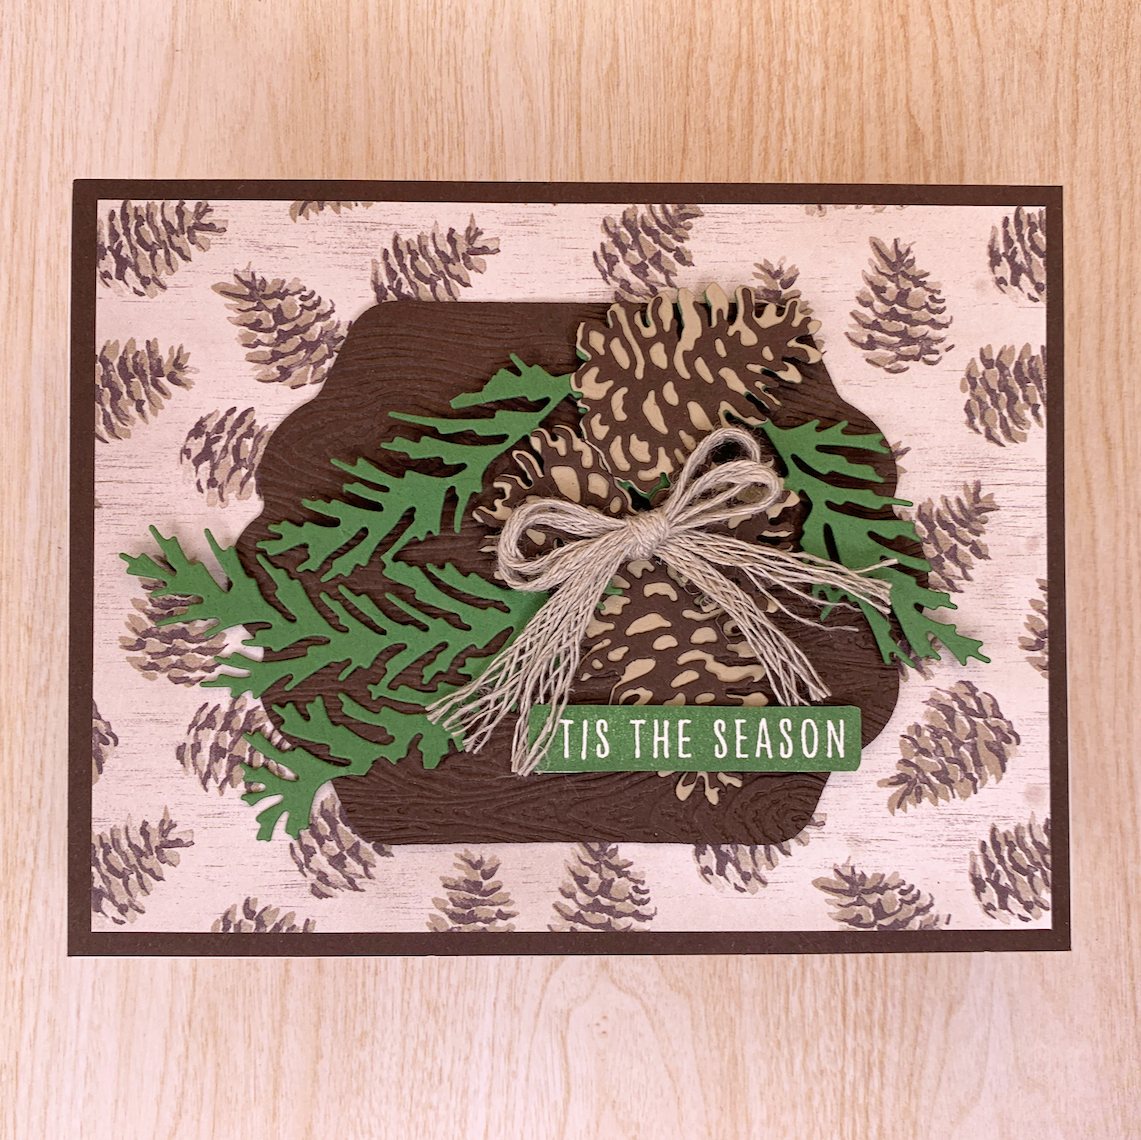
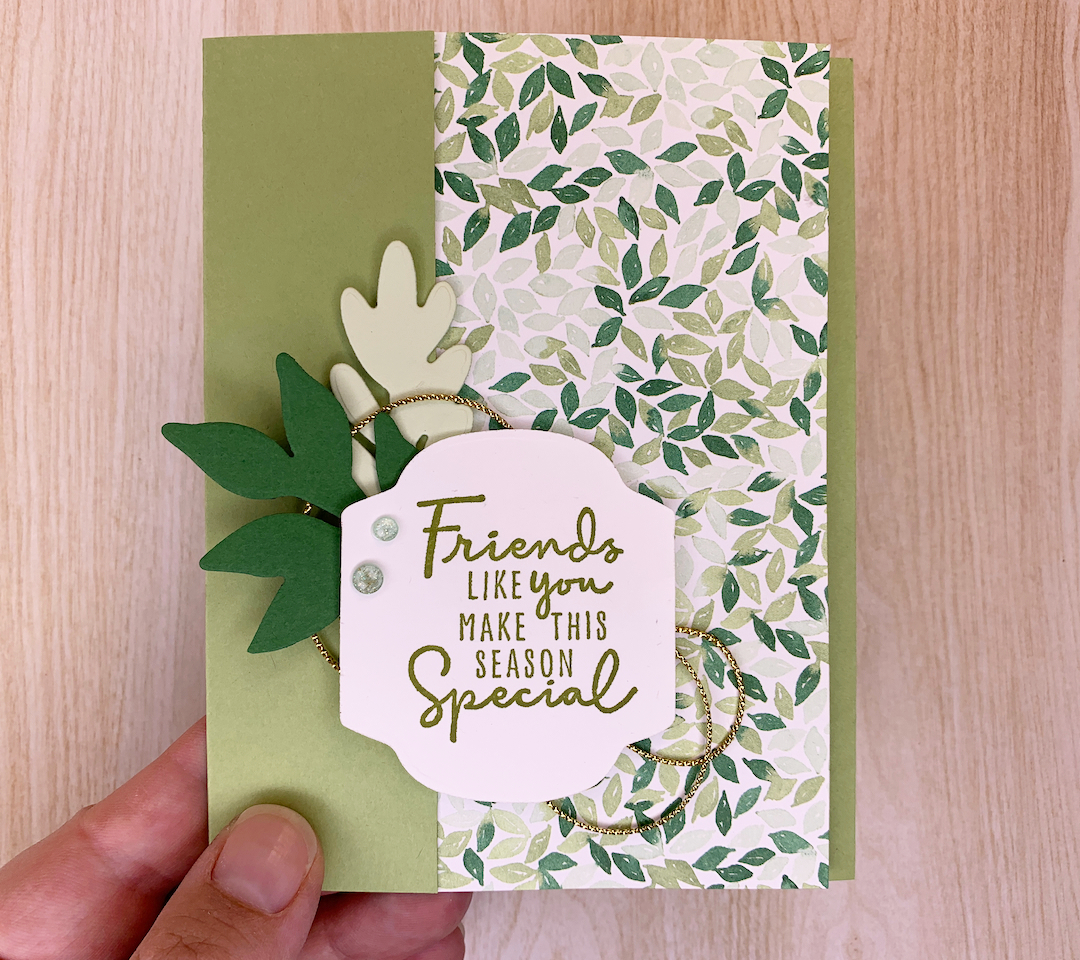
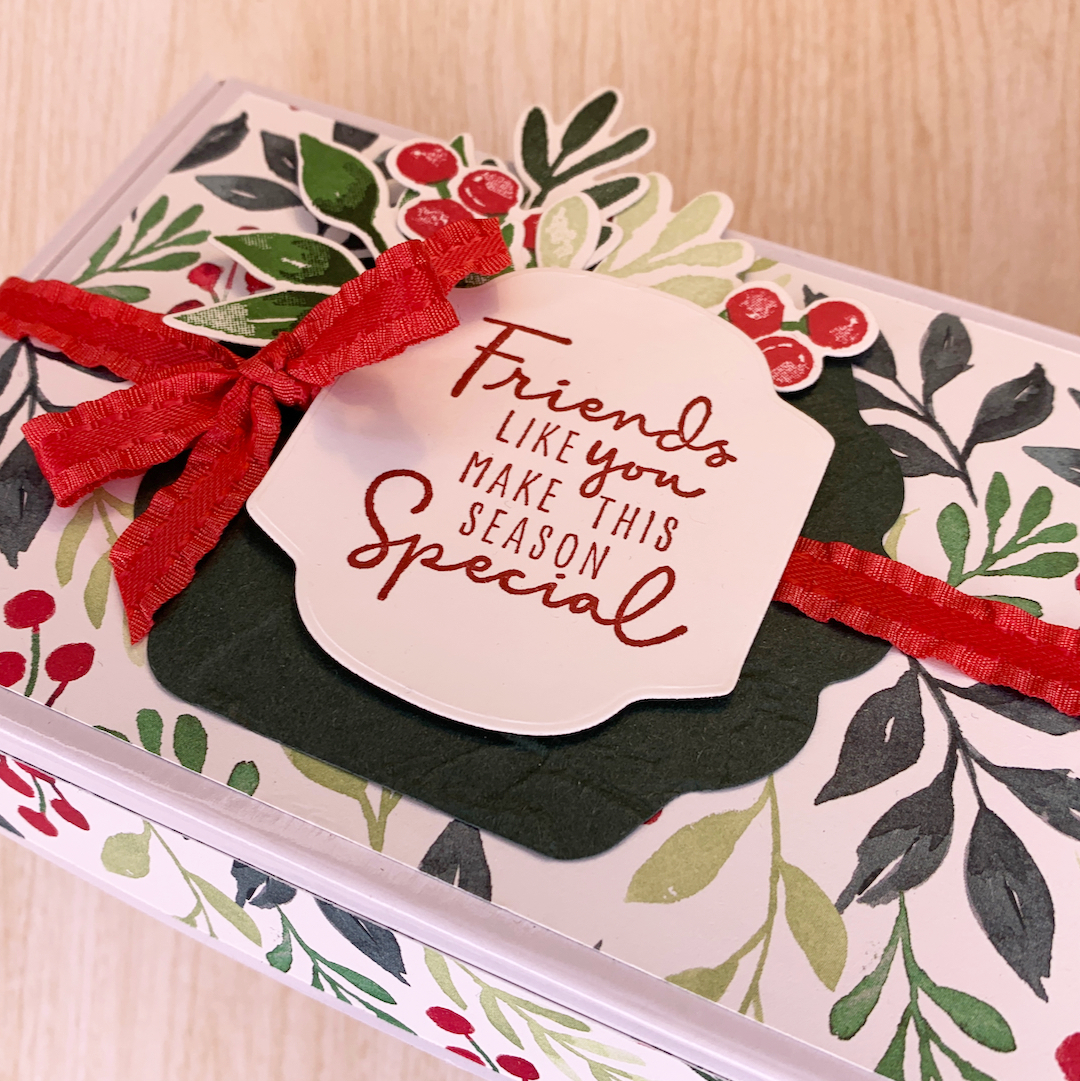
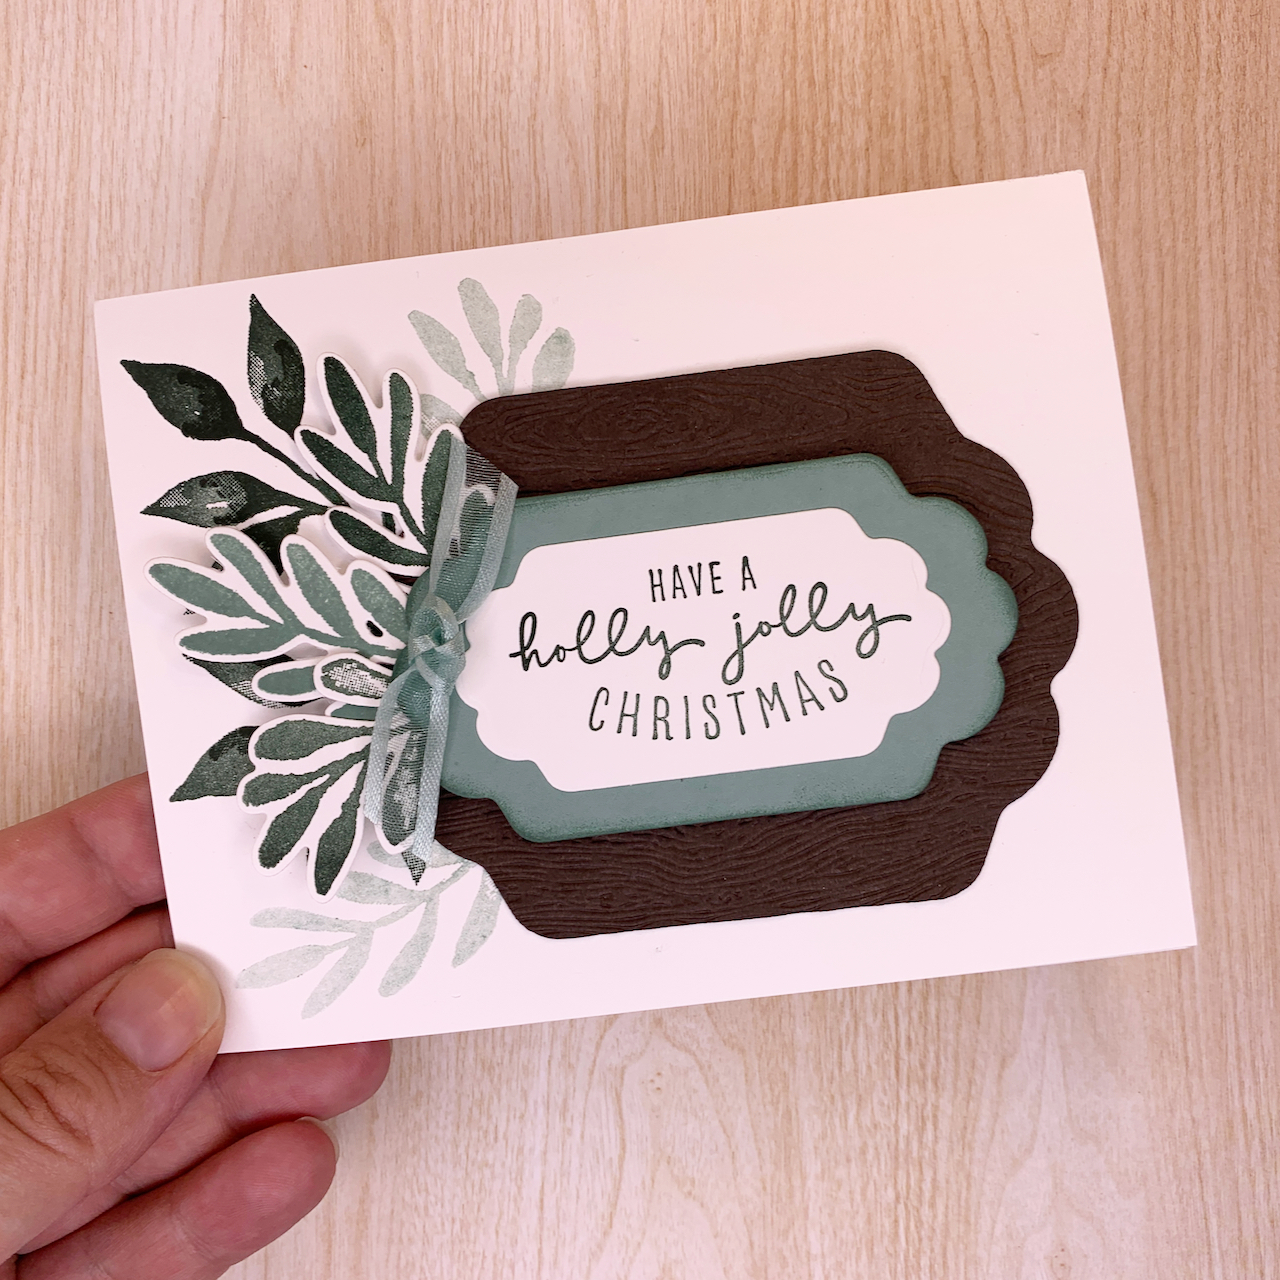
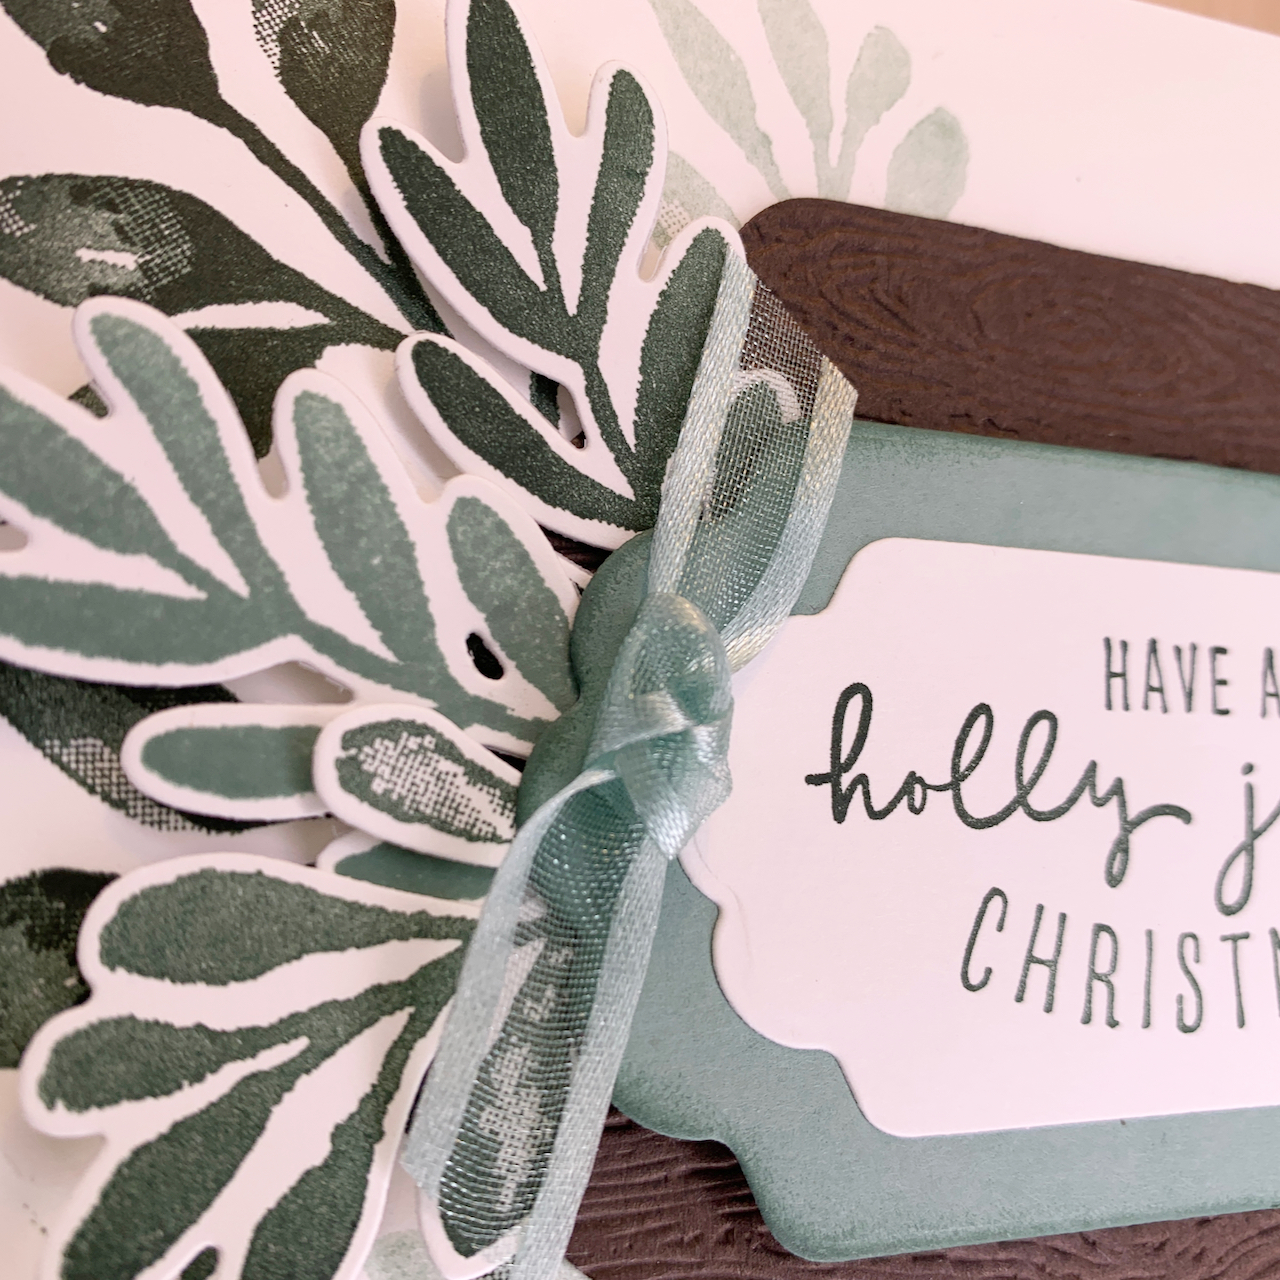
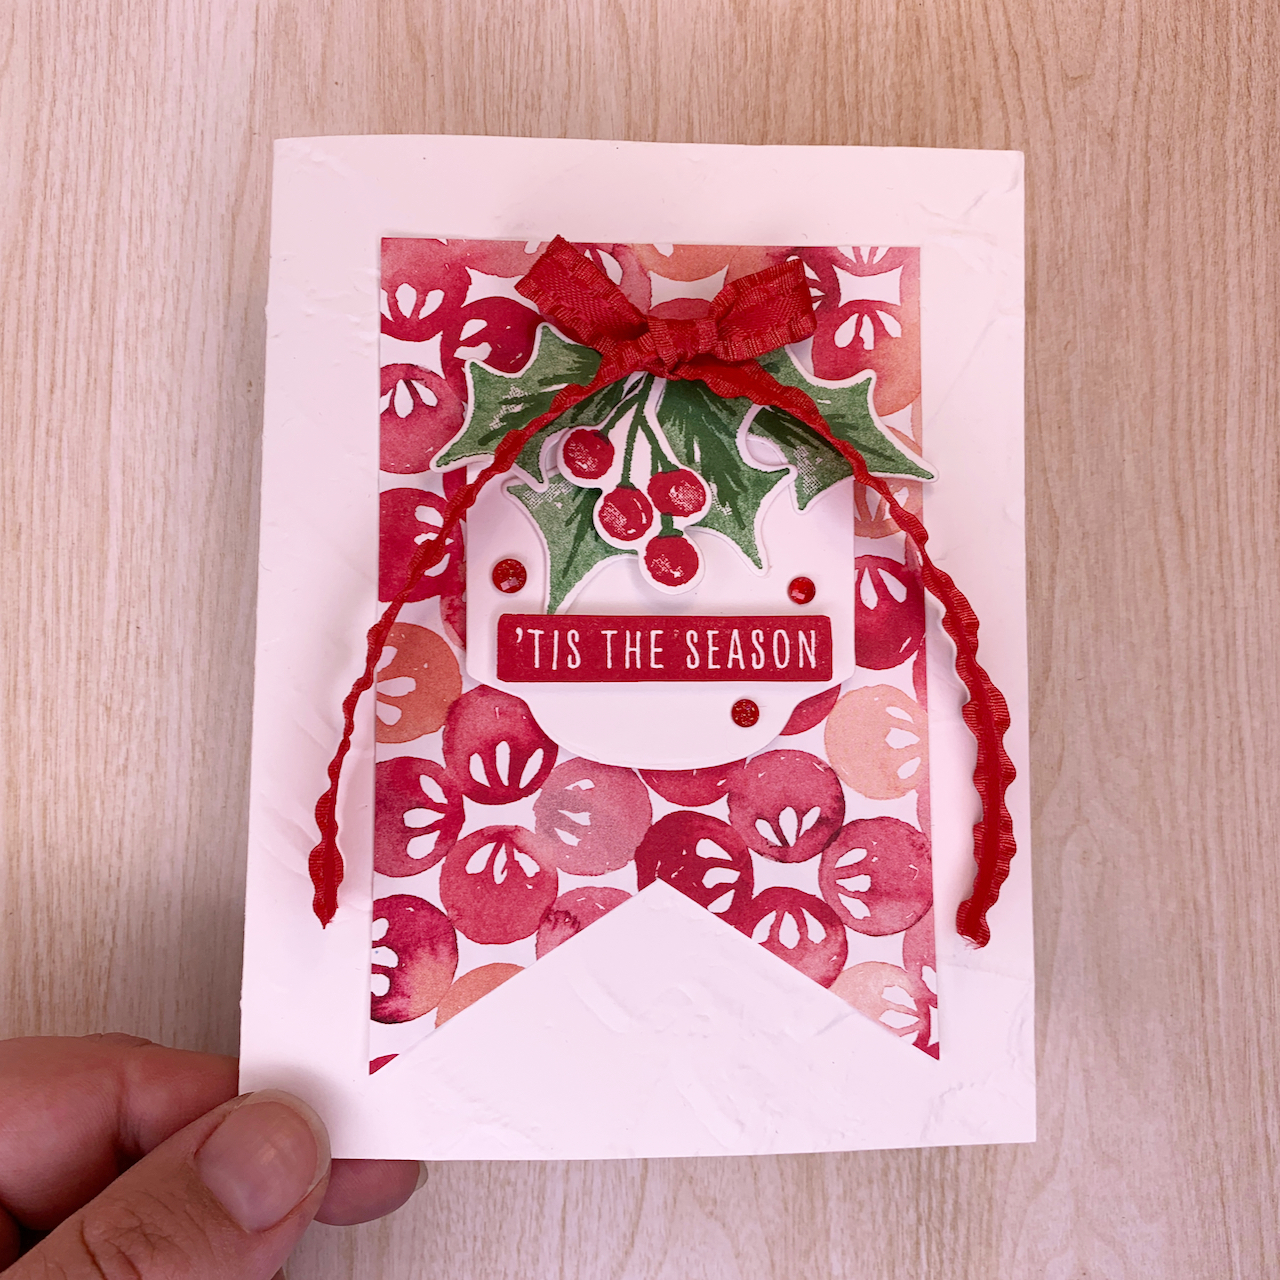
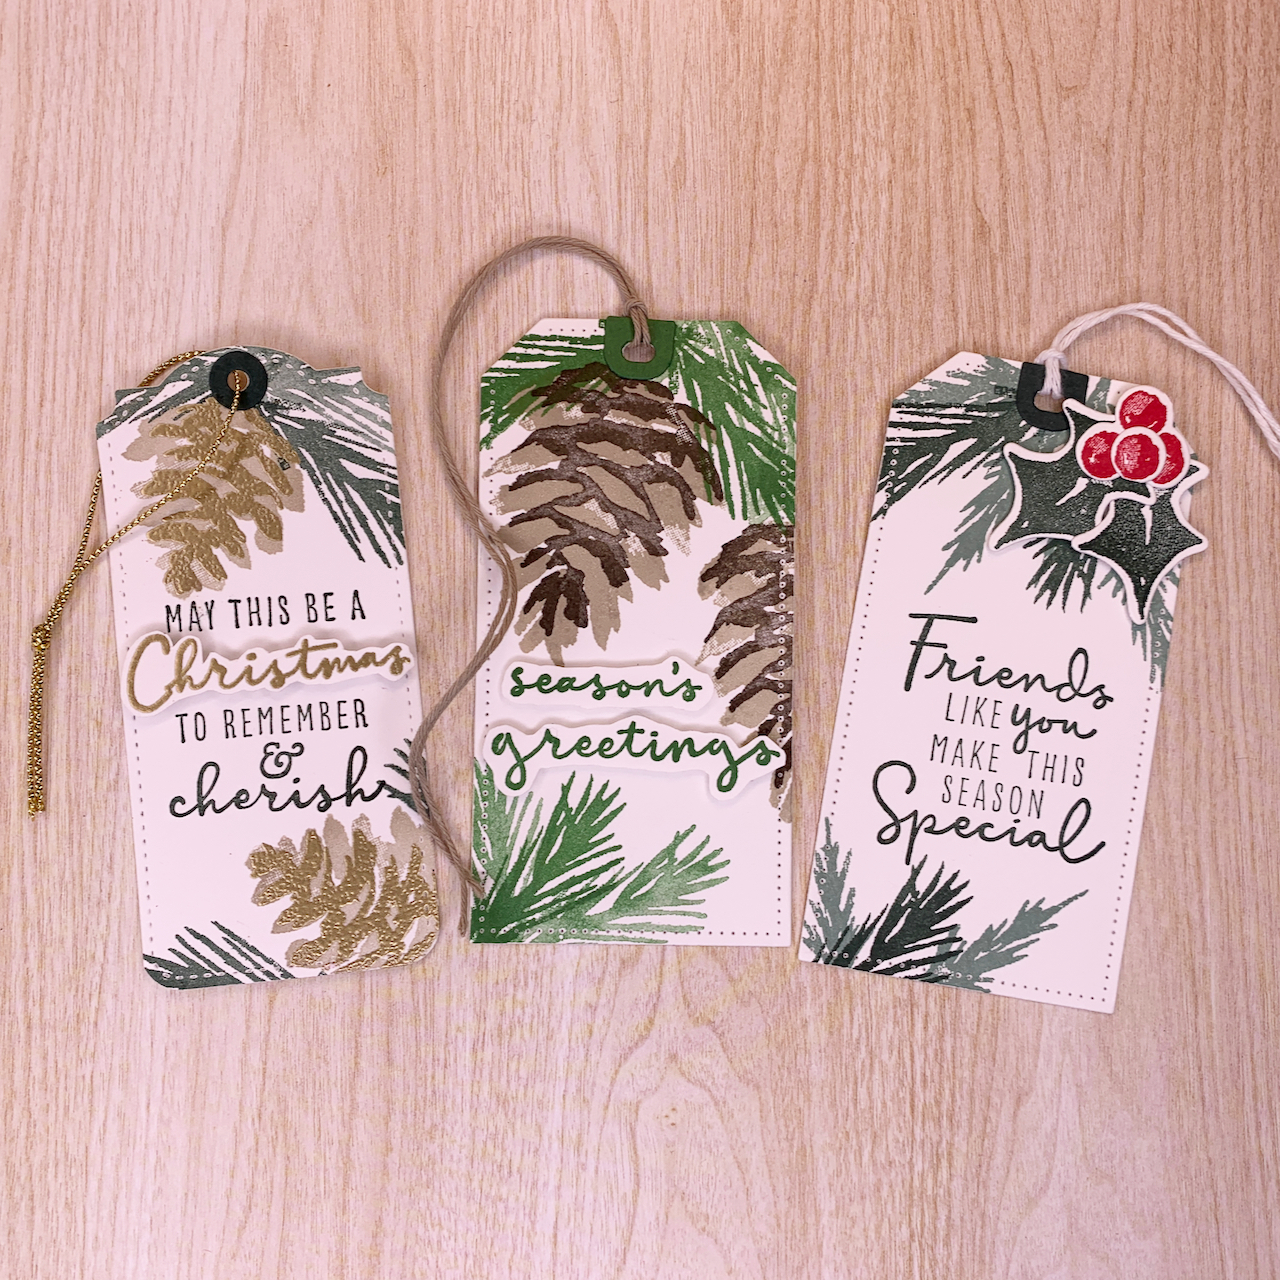
I have utilized the Two-Step Stampin’ features of the stamp sets but there are still a lot of ideas I have yet to hash out with the Christmas Pinecone dies. Without further ado, let’s look at the designs I have accomplished!
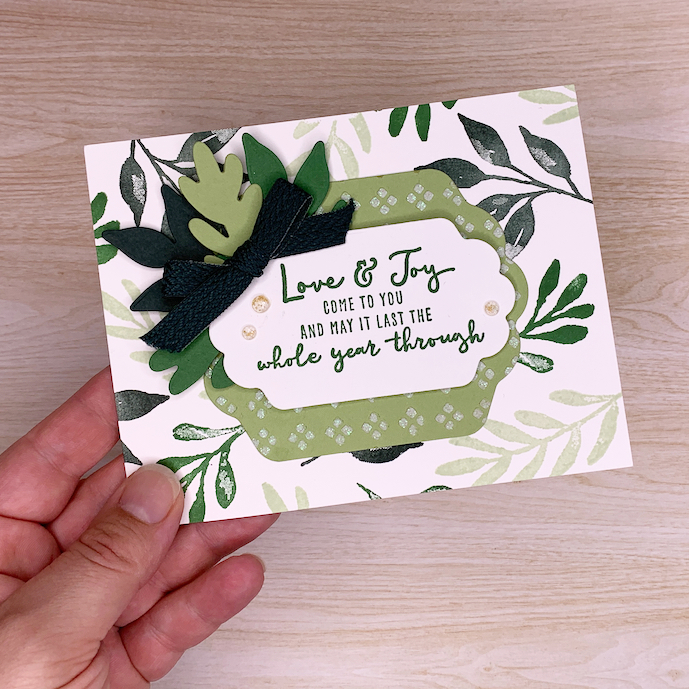
Shop the Painted Christmas Suite

    I hope you found lots of inspiration for your handmade Christmas cards and holiday creations. Please do not hesitate to contact me if you have any questions.

    Until the next one, Dawn

    Creative Blend Newsletter

    Stay inspired and subscribe to receive updates from the blog, upcoming card classes, events and crafty sales straight to your email.

    Find me on social media

    Stay connected with me online and see even more creative inspiration I’m sharing!

    Quick and simple cards using Beautifully Penned Sale-A-Bration DSP

    Quick and simple cards using Beautifully Penned Sale-A-Bration DSP

    Quick and simple cards using Beautifully Penned Sale-A-Bration DSP

    These cards were so quick and simple to make that I couldn’t stop at just one! I used the Beautifully Penned Designer Series Paper (DSP) which is another one of the free Sale-a-bration items Stampin’ Up! is offering until September 30.  

    I wanted to try designs that showcased both sides of the DSP since the entire pack is black and white and you get a lot of it! I love a good black and white pattern because of the versatility. It can be used for both feminine and masculin occasions and can be paired with any colour.

    Beautifully coordinated

    The Beautifully Penned DSP also coordinates with everything “Hand-Penned” as seen in the Annual Catalogue on pages 103 & 104. I used the Hand-Penned bundle in my card samples. These are the Hand-Penned products available in the Annual Catalogue:

    There is a 10% savings when purchasing a Hand-Penned Petals Bundle. The savings price is $63.75 and would qualify your order for a free Sale-A-Bration item such as the Beautifully Penned DSP up until midnight on September 30.

    Beautifully paired with Pale Papaya In-Color

    This design was perfect for showcasing both the front and back of the DSP. Leaving a 1-¼” flap of base cardstock on the front allowed me to use a large piece of the DSP. When the card is opened, the backside pattern is visible. This is such a perfect design when both the back and front of the DSP are similar.

    I split a roll of Pale Papaya & White ½” ribbon with a fellow Stampin’ Up! Demonstrator and it was sitting on my desk begging to be used. It works with the dominant white pattern but also helps ground the busy side of the backside pattern. The scalloped rectangles were die cut from the Stitched So Sweetly Dies and the sentiments are from the Hand-Penned Petals stamp set.  I finished off the card with a few of the Pale Papaya Genial Gems. Which Pale Papaya card do you like most?

    Beautifully paired with Fresh Freesia In-Color

    I flip flop with Fresh Freesia or Pale Papaya being my favourite of the 2021-2023 In-Color collection. In these cards I used the Hand-Penned Petals stamp set and filled in the flowers with 1st and 2nd generation stamping of Fresh Freesia ink. The green colour I used for the leaves and ribbon (on the dot background card) was another In-Color called Soft Succulent. Stampin’ Up! really hit it out of the park this year with the five new In-Colors. Now you’re probably wondering what the other two In-Colors are… they are Evening Evergreen and Polished Pink. 

    Using the stamps to fill in the images is so fast and easy. I love Two-Step Stampin’ sets because it gives you so many options when making your cards and therefore more value for your purchase.

    Monochromatic cards using Beautifully Penned DSP

    These two monochromatic cards are my husband’s favourite. I really like them too but I still fancy the Pale Papaya cards. 

    Using a couple of the dies from the Penned Flowers Dies, I cut out the flower clusters from Basic Black and Basic White paper. They make stunning focal points and are the perfect size. Again, the sentiments come from the Hand-Penned Petals stamp set and the black twine is from Baker’s Twine Essentials Pack.

    Combining Beautifully Penned DSP patterns

    I challenged myself with this card. I wanted to combine the patterns on a card front and use the ripped paper look because it would work nicely with separating the patterns a bit. The torn paper leaves a white edge and that’s what helps distinguish the separation of the patterns. 

    If you are interested in the Beautifully Penned Sale-A-Bration DSP, you get it free with a $60 order from my online store or you can simply contact me to make an order. If you want to learn more about the Sale-A-Bration items or how this promotion works, visit my What is Sale-A-Bration and how do I get free items post.

    If you have any questions regarding the supplies or measurements, be sure to leave a comment below or contact me and I will gladly help you out! 

    Remember to tag me (@creativeblendwithdawn) on social media if you make any of these card designs. I would love to see them.

    Until the next one, Dawn

    Creative Blend Newsletter

    Stay inspired and subscribe to receive updates from the blog, upcoming card classes, events and crafty sales straight to your email.

    Find me on social media

    Stay connected with me online and see even more creative inspiration I’m sharing!

    Make an interactive birthday card with the free Penguin Playmates Sale-a-bration item

    Make an interactive birthday card with the free Penguin Playmates Sale-a-bration item

    Make an interactive birthday card with the free Penguin Playmates Sale-a-bration item

    Isn’t this penguin and polar bear card just the cutest? I used the Penguin Playmates Designer Series Paper (DSP) which is perfect for Winter birthday cards. It is another one of the free Sale-a-bration items Stampin’ Up! is offering until September 30.  I also added an Action Wobbler to make it interactive. I’m sort of on a Wobbler kick right now and can’t stop adding them to cards that have cute characters on them. Take a look at the 4-second video showing the penguin wobbling.

    Penguin Playmates DSP pack

    Before I explain how I made the card, I want to show you all the designs that come with this paper pack. There are numerous penguins, polar bears, foxes, and snowmen to either fussy cut or use as-is. I like the patterns on the opposite sides of the paper a lot. They are bright, colourful, and can be used for more than just winter-themed cards. 

    The colours that coordinate with the paper are Balmy Blue, Calypso Coral, Fresh Freesia, Just Jade, Misty Moonlight, Soft Sea Foam, and Basic Black. This DSP pack also coordinates with the Penguin Place Bundle (156789) on page 33 from the July–December 2021 Mini Catalog.

    PENGUIN PLAYMATES 12″ X 12″ (30.5 X 30.5 CM) DESIGNER SERIES PAPER

    158420
    SALE-A-BRATION
    FREE WITH $60 PURCHASE

    Supplies, measurements and directions to make the card 

    Stamps

    • Sweet Ice Cream photopolymer set (158224)

    Paper

    • Penguin Playmates 12″ x 12″ (30.5 x 30.5 cm) Designer Series Paper (158420)
    • Gray Granite cardstock (146983)
    • Basic White cardstock (159231)

    Ink

    • Gray Granite classic stampin’ pad (147118)

    Other

    • Tailor Made Tags Dies (155563)
    • Subtle Shimmer Sequins (156407)
    • White twine from Baker’s Twine Essentials pack (155475)
    • Action Wobbler 

    Measurements

    • Gray Granite (base): 8-1⁄2” x 5-1⁄2”, score at 4-1⁄4”
    • Designer Series Paper – 2 strips of snowflake pattern: 1⁄2” x 5-1/2”
    • Designer Series Paper – trees pattern: 3” x 5-1/2”
    • Gray Granite – bottom tag: 2” x 4”
    • Basic White – top tag: 2” x 4”
    • Basic White – scrap piece for stamped sentiment
    • Basic White – for inside card: 3-1/2″ x 5-1/2″

    Directions

    1. Stamp the greeting using Gray Granite ink on Basic White scrap cardstock. Cut the words apart using your scissors.
    2. Die cut the largest sized tag from the Tailor Made Tags Die using the 2” x 4” Gray Granite cardstock. 
    3. Die cut the largest sized tag from the Tailor Made Tags Die using the 2” x 4” Basic White cardstock. 
    4. Fussy cut the polar bear and penguin characters from the Designer Series Paper.
    5. Center the tree patterned DSP in the center of the front panel and adhere only down the middle.
    6. Tuck and adhere one strip of the snowflake patterned DSP under the tree patterned DSP leaving about 1/4″ showing. Do the same to the other side of the tree patterned DSP.
    7. Adhere the edges of the tree patterned DSP down now that the snowflake patterned DSP has adhered.
    8. Loop and secure the white twine through both the Gray Granite and Basic White die cut tags at the same time.
    9. Offset them a bit and adhere them down in the centre of the card front. 
    10. Using Mini Dimensionals, adhere the Happy Birthday sentiment as shown on the card.
    11. Using Dimensionals, adhere the polar bear down as shown on the card.
    12. Attach an Action Wobbler to the backside of the penguin.
    13. Adhere down the penguin as shown.
    14. Scatter a few Subtle Shimmer Sequins (I used 5) and adhere them down with a dot of liquid glue.

    This tutorial is copyright by Creative Blend and may not be sold or distributed for monetary gain. Thanks!

    More ideas using the Penguin Playmates DSP

    Another idea I had while working on this card was to make a tag set with the DSP and use the Action Wobblers on the character that would appeal the most to your recipient. You could make a tiny box with the DSP that would fit the set of tags and give it as a gift to someone. 

    The Action Wobbler is the “wow” factor for this card. An interactive card using them can’t get any easier to make and you’ll find it hard to stop activating the wobbler yourself 🙂

    I hope you give this tutorial a try and I would love it if you tagged me (@creativeblendwithdawn) in a social media post if you make it.

    If you are interested in getting your hands on the Penguin Playmates DSP, you can get it free with a $60 order from my online store or you can simply contact me to make an order. If you want to learn more about the Sale-A-Bration items or how this promotion works, visit my What is Sale-A-Bration and how do I get free items post.

    Until the next one, Dawn

    Creative Blend Newsletter

    Stay inspired and subscribe to receive updates from the blog, upcoming card classes, events and crafty sales straight to your email.

    Find me on social media

    Stay connected with me online and see even more creative inspiration I’m sharing!